Ever started a home project that seemed easy but quickly spiraled into frustration? Adding or refinishing caulk work on a baseboard is one of those tasks where a small misstep can mean uneven lines, gaps that don’t seal, or a finish that doesn’t last. The good news is most of these mistakes are completely avoidable with the right know-how.
Whether you’re sealing up for a cleaner look or better energy efficiency, this guide will help you skip the stress. We’ll cover common mistakes and share practical tips to make your baseboards look like a pro handled them—without the hefty cost.
Why Baseboard Caulking is Important
Baseboard caulk projects go beyond improving the look of a room—they serve a critical function in maintaining a healthy and efficient home. Sealing the gaps between your walls and floors with caulk helps keep out dirt, pests, and moisture that can cause long-term damage.
It also improves energy efficiency by blocking drafts, making it easier to maintain a comfortable temperature indoors. When it’s done properly, caulking enhances both the appearance and the durability of your baseboards.
But when mistakes are made, you risk dealing with peeling, cracking, or gaps that compromise its effectiveness. Taking the time to caulk correctly ensures a finished look while protecting your home’s structure and your wallet.
Common Mistakes to Avoid
Even a simple caulking project can go sideways if you’re not careful. Mistakes often stem from skipping prep work, rushing the application, or using the wrong materials.
Each step matters when it comes to creating a professional-looking finish, so here are the most common mistakes to watch for and how to avoid them.
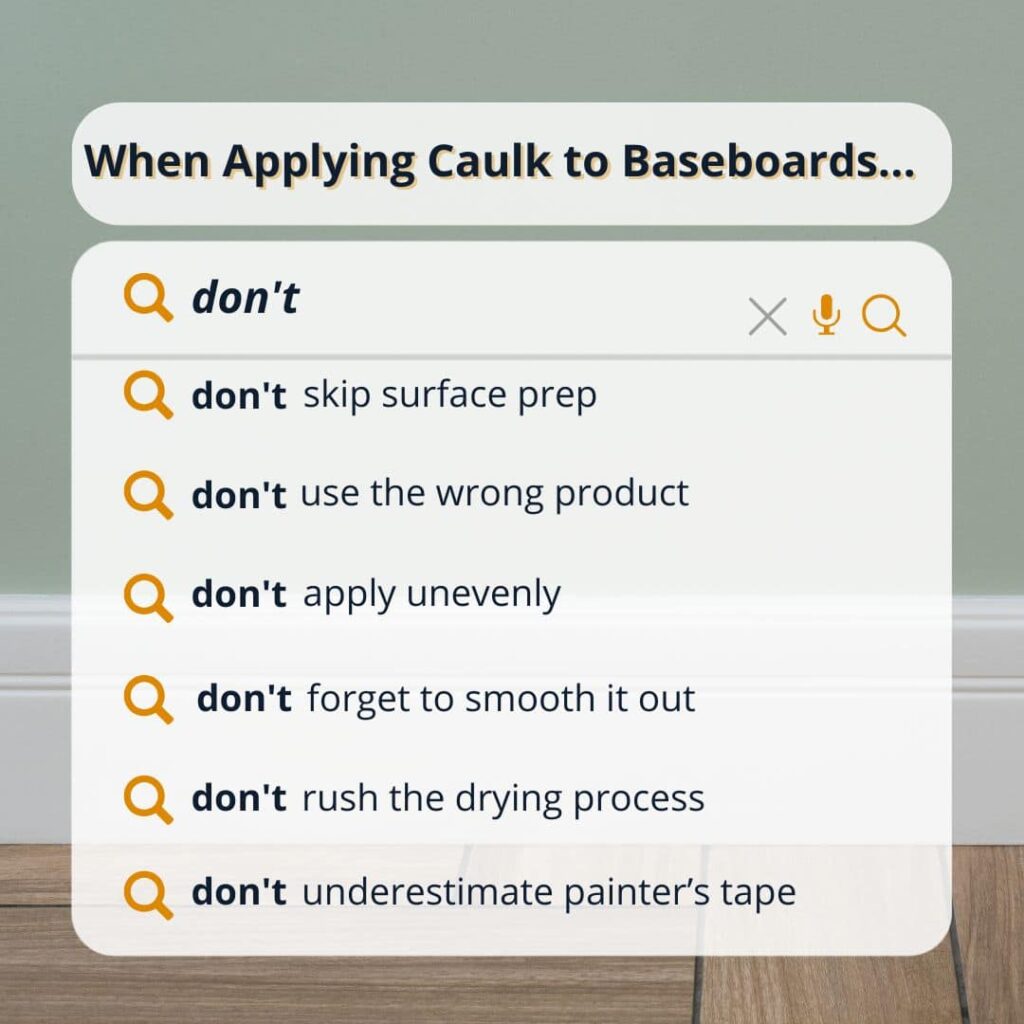
1) Neglecting Surface Preparation
Caulk won’t stick to dirty or uneven surfaces, so prepping the baseboards is essential. Dust, grime, and old caulk residues create barriers that prevent proper adhesion, leading to peeling or gaps over time.
Start by wiping down the area with a damp cloth and letting it dry completely. If there’s old caulk present, carefully remove it with a utility knife or caulk removal tool. Sand down rough patches to create a smooth surface where the new caulk can adhere effectively.
A clean, well-prepped surface is the foundation of any successful caulking project.
2) Using the Wrong Caulk
Choosing the right caulk is just as important as how you apply it. Acrylic latex caulk is ideal for baseboard work because it’s paintable and easy to work with.
Silicone caulk, while great for areas exposed to moisture, isn’t paintable and could leave your baseboards looking mismatched if you plan to add a coat of paint. Always check the label to ensure the caulk you select is designed for indoor use and is compatible with the materials you’re working with.
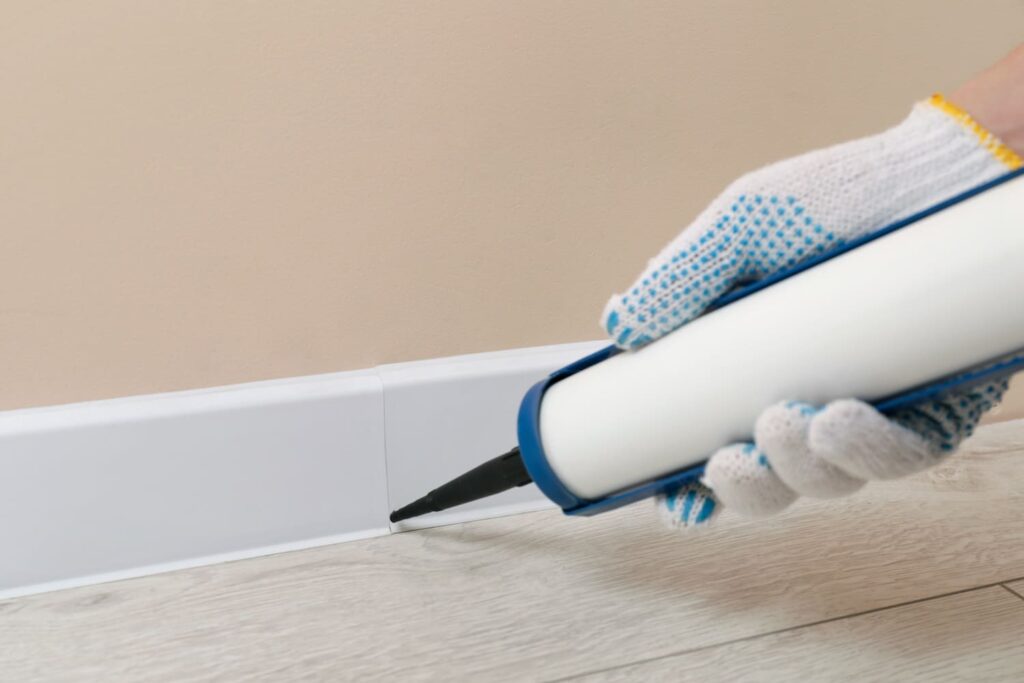
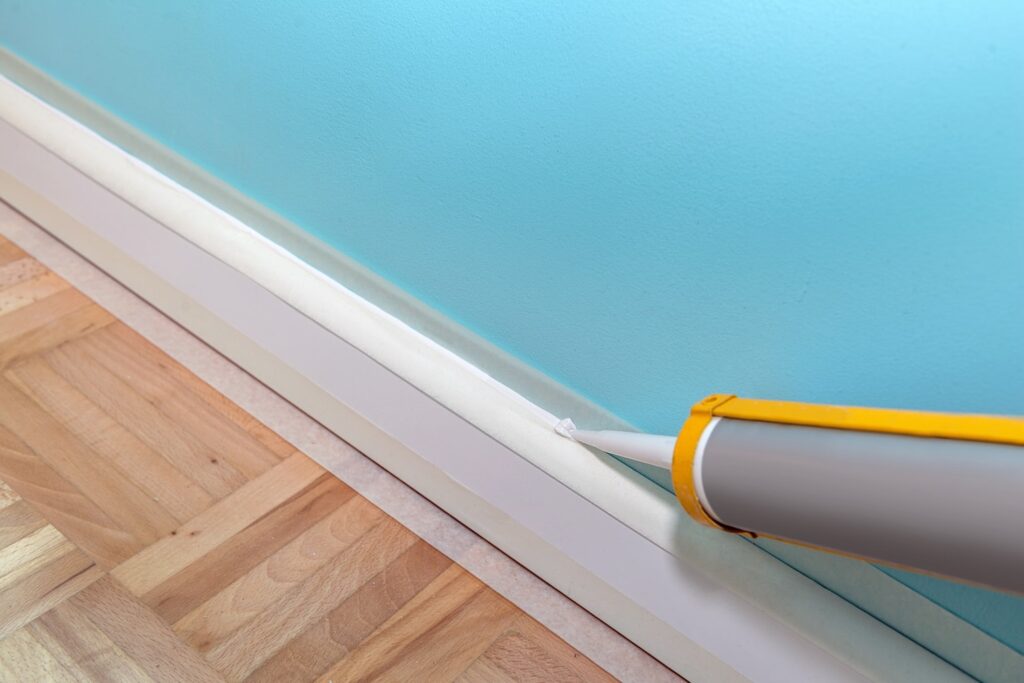
3) Applying Unevenly
An uneven bead of caulk can ruin the appearance of your baseboards and create gaps that reduce its effectiveness. Uneven application often happens when you move the caulk gun too quickly or squeeze the tube too hard.
For a smoother finish, cut the tip of the caulk tube at a 45-degree angle to control the flow and move the gun steadily along the gap. Applying consistent pressure ensures an even bead that blends seamlessly with the baseboard.
4) Skipping the Smoothing Process
Caulk doesn’t automatically look neat once it’s applied—it needs to be smoothed out. Skipping this step can leave rough edges or uneven lines that make the job look sloppy. Use a caulking tool, or simply dampen your finger, to gently smooth the bead while it’s still wet. This step ensures a clean finish and helps the caulk adhere properly to both surfaces.
5) Ignoring Proper Drying Times
Caulk needs time to dry and cure before it can do its job effectively. Rushing the process by painting or exposing it to moisture too soon weakens the bond and can lead to cracking or peeling.
Read the manufacturer’s instructions for recommended drying times, and plan your project accordingly to allow the caulk to set completely.
Pro Tips for Perfect Baseboard Caulk Results
- Use painter’s tape to keep your lines neat and protect adjacent surfaces.
- Practice applying caulk on a scrap surface to build confidence before starting.
- Keep a damp rag handy to clean up any excess caulk as you work.
Other Recommended Maintenance for Baseboard Caulk
Once your baseboards are freshly caulked, it’s a good idea to look at other areas of your home that could benefit from small maintenance projects.
Inspect gaps around windows and doors where drafts might sneak in or pests could find their way inside. Adding caulk to these areas can improve energy efficiency and help keep your home sealed against outdoor elements.
Repainting trim or touching up high-traffic areas is another way to keep your home looking polished. Small upkeep tasks like these not only improve the appearance of your space but also help prevent bigger issues down the line.
When to Call a Professional
While caulking baseboards is a manageable project for many homeowners, if the gaps are too large to fill smoothly, the baseboards are damaged, or the area has significant wear and tear, professional expertise ensures a seamless finish.
Home inspectors or contractors can also spot related issues, such as moisture problems or structural concerns, that might need more attention than caulk alone.
Investing in professional help saves time, reduces stress, and ensures a polished, durable result.
Conclusion
Taking the time to avoid common mistakes when working with caulk on the baseboard can make a big difference in how your project turns out. With proper preparation, the right materials, and attention to detail, you can achieve a professional-quality finish that protects your home and enhances its appearance.
Prospective Home Inspections is here for you in Naperville, IL, and surrounding areas for larger projects or professional assistance. Whether you need expert advice or a thorough home inspection, contact us today to keep your home in top condition.